Model Making
A contemporary fashion project where branding meets digital clarity. We created a bold yet minimal identity system and extended it into a clean, immersive online experience. The result is a brand that feels timeless and ready for the future.
2025
Branding, Digital
Cube Modelling (Week 1-3)
Foam Board & Foam
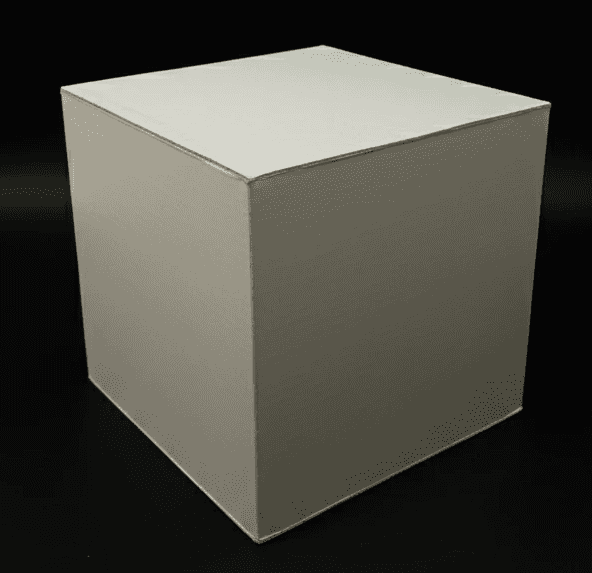
During the first few weeks of building models out of foam board, I learnt how to use both hand tools and machinery to make precise joins, clean cuts and smooth curved edges. To begin, I carefully drew the foam board cube's dimensions so I could see how each part would fit together. I also considered the material's thickness to ensure that, when constructed, the edges would line up neatly and the overall form would remain accurate and well-proportioned.
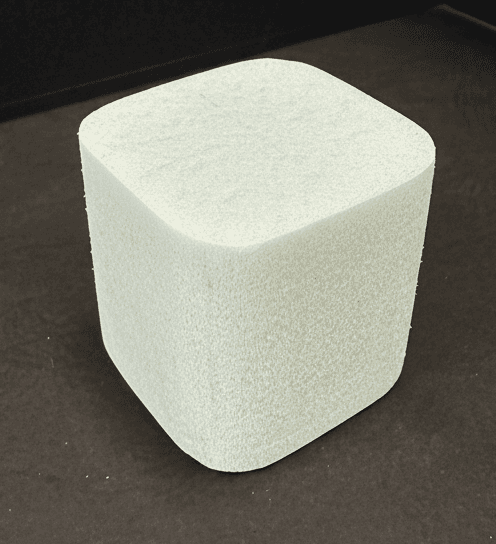
I put cardboard on the top and bottom faces of the foam cubes to get more accurate measurements before smoothing the surfaces. I made each face of the curved-edge cube separately because each side had rounded edges. After that, I carefully sanded the shape to make the curves even and well-defined and to make the surface smooth. To maintain the cube's shape while sanding, I taped over the areas I didn't want to alter. Through this practical approach, I developed a strong understanding of form, proportion, and spatial relationships as well as the importance of precision, tenacity, and skill in creating polished models that effectively communicate design intent.
Small Cube
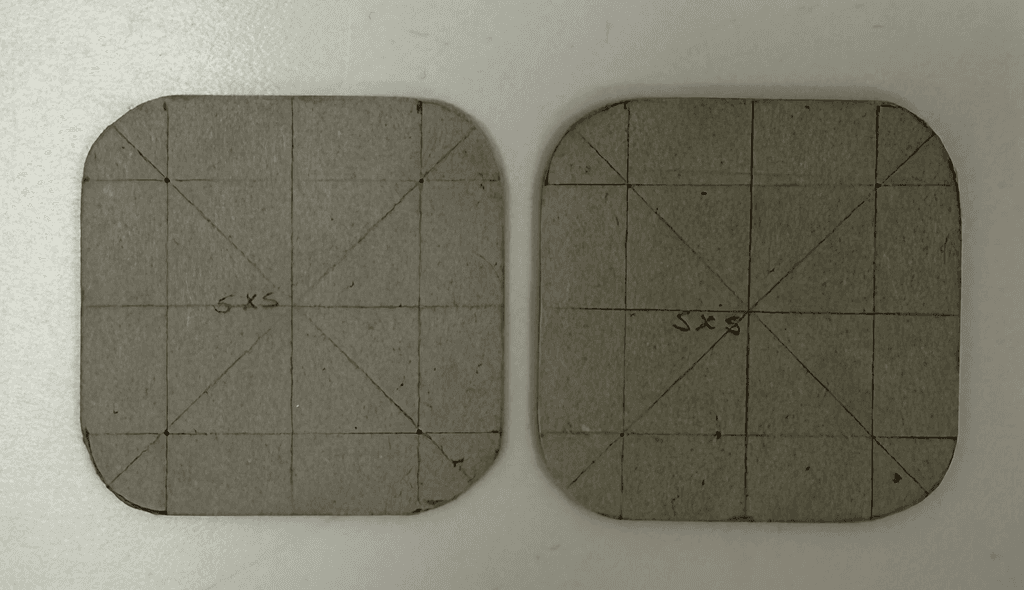
Small Cube Dimensions
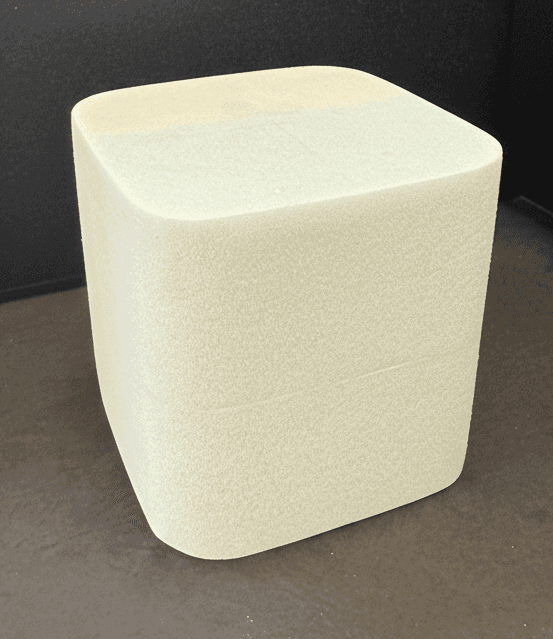
Big Cube

Big Cube Dimensions
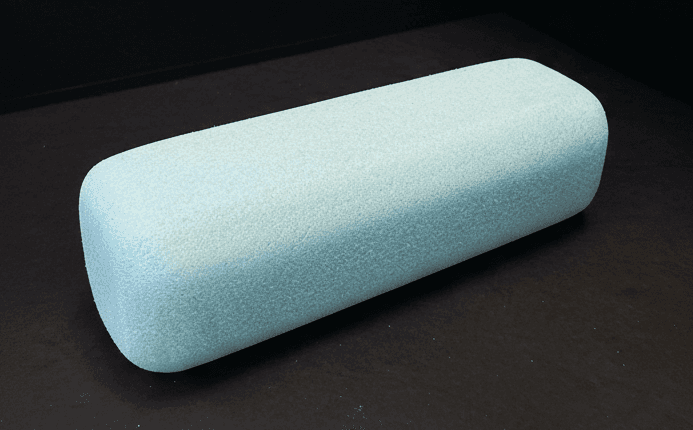
Curved Edge Cube

Curved Edge Cube Dimension
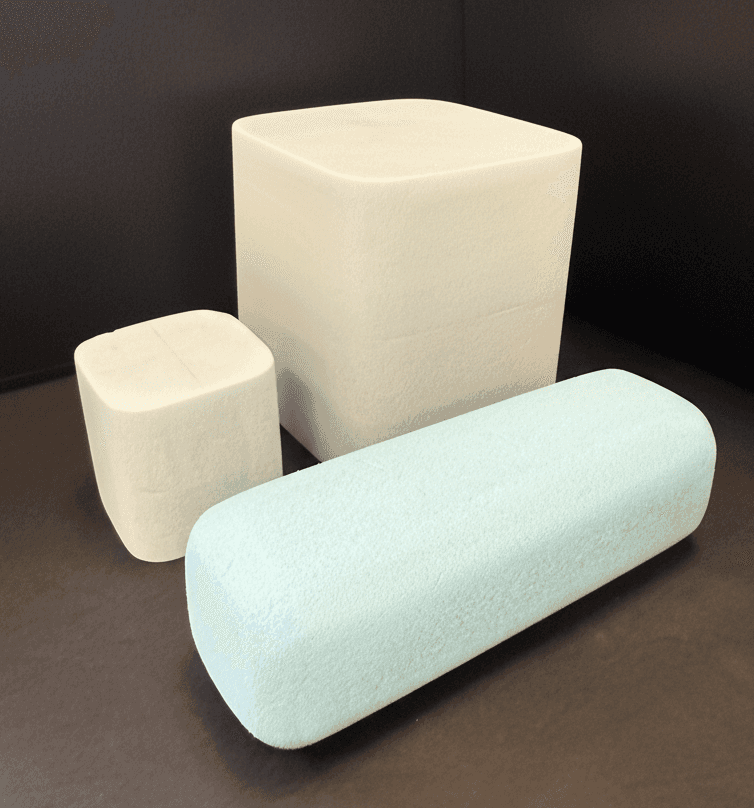
Foam Cube Models
Rectilinear & Curvilinear (Week 3-6)
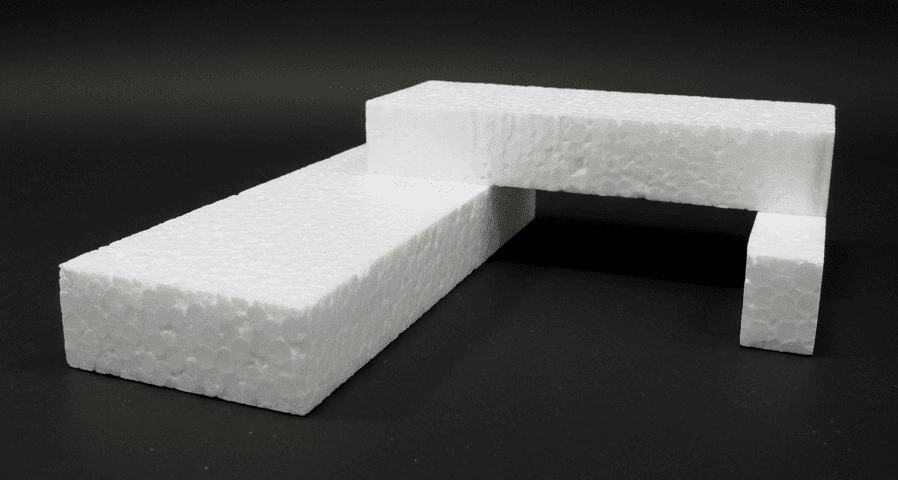
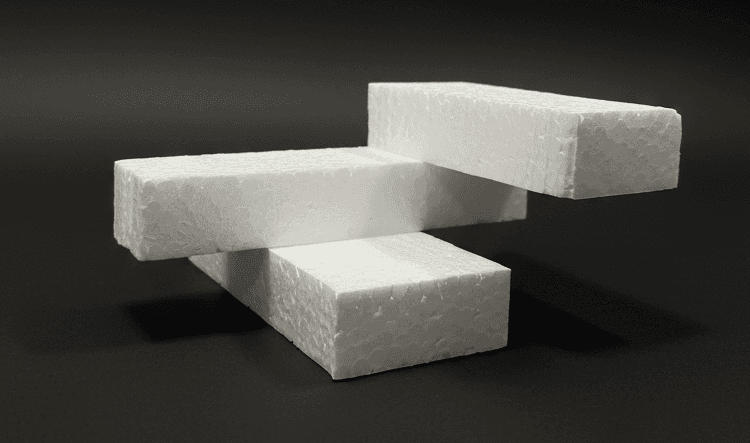
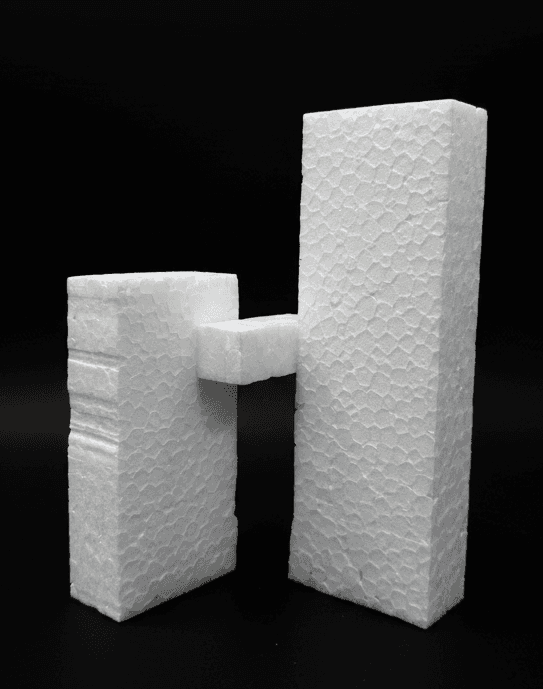
Abstract Building Structures
We started investigating how these separate components could combine to create coherent structures as we learnt how to make foam forms. In order to gain a more controlled understanding of the relationship between planes, edges, and volumes, we first concentrated on rectilinear forms. The balance between the dominant, subdominant, and subordinate forms was emphasised in each of the three ideations I made in the early stages.
The dominant form determined the overall proportion and direction of the structure and functioned as the primary visual focus. While the subordinate form served as a subtle element that brought the composition together, the subdominant form supported and complemented it, adding contrast and visual interest. I now have a better understanding of spatial hierarchy, proportion, and how different forms work together to produce designs that are both dynamic and harmonious because of to this exercise.
Ideation 1
Ideation 2
Ideation 3
Abstract Building Structures
After working with straight lines, we started to look into how to add curved lines to our buildings. I decided to work on the first two of my three initial ideas by making changes to better define the dominant, subdominant, and subordinate forms. I didn't change ideation 3 because it already had forms that were clearly different from each other. I replaced one of the foam blocks with cardboard in ideation 1 to add a curvilinear element. This made the main shape stand out more because of the difference in shape and material. For ideation 2, I tried out foam board, cardboard, and paper to see how different weights and textures could be stacked on top of each other to make the whole structure look more balanced and deep.
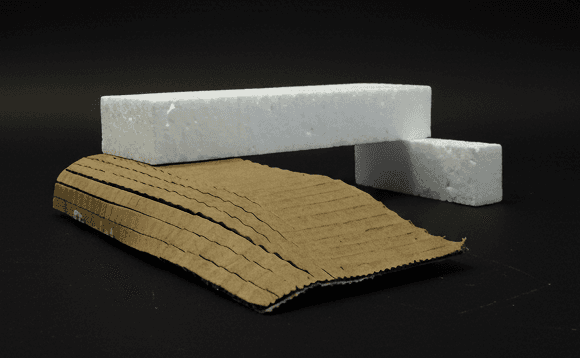
Foam and Cardboard
Foam board, Cardboard, and Paper
Building Model (Week 7-12)
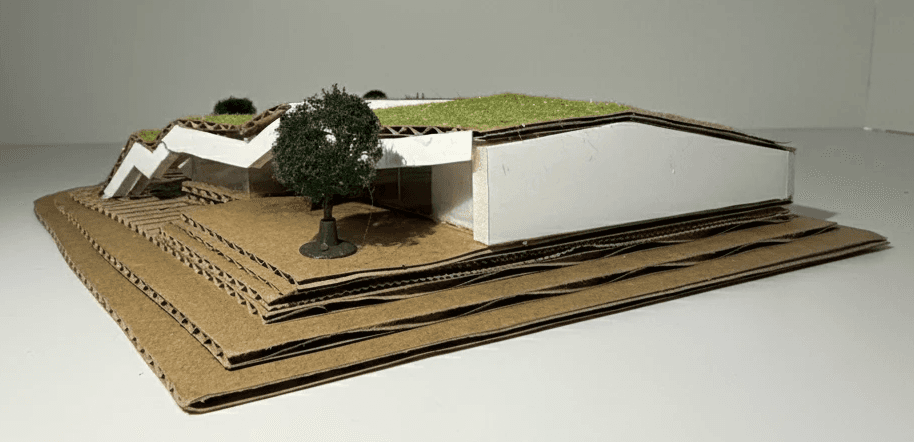
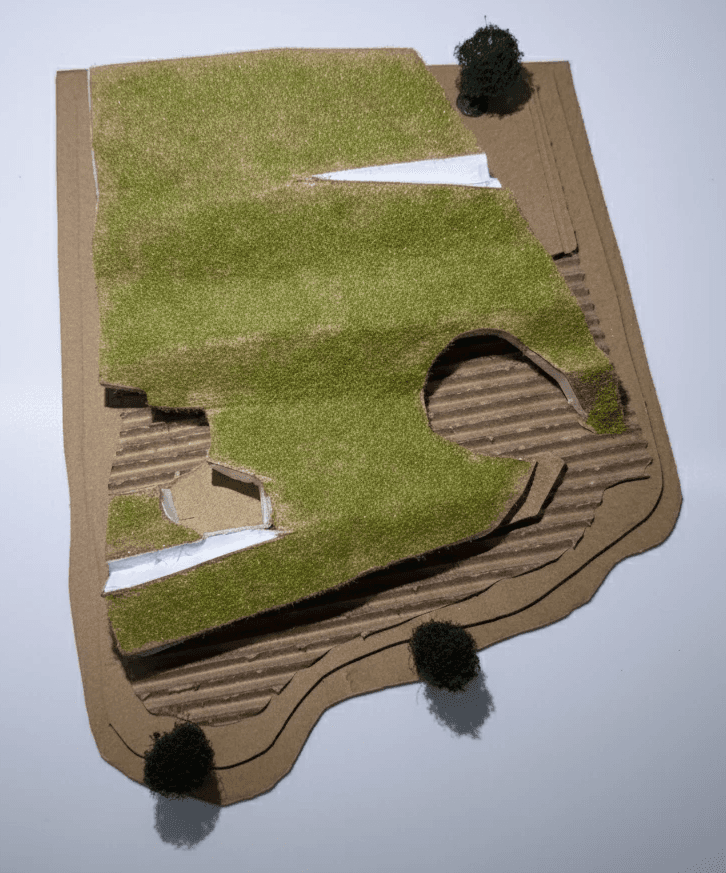
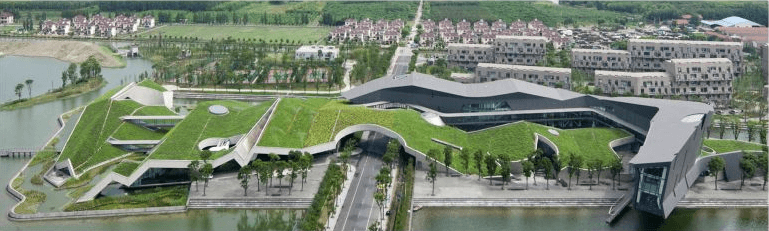
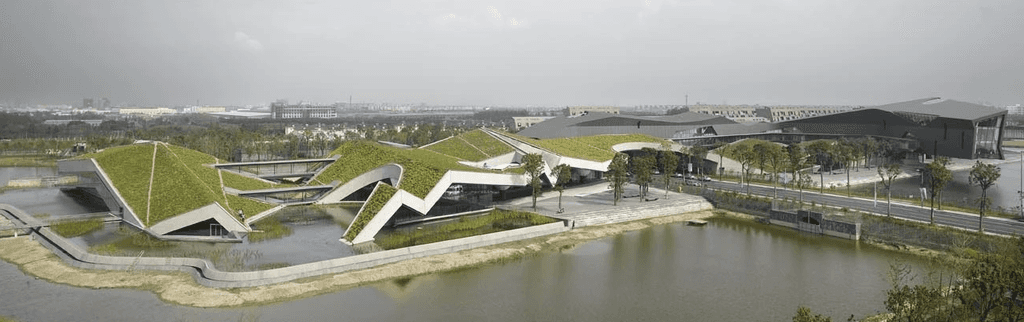
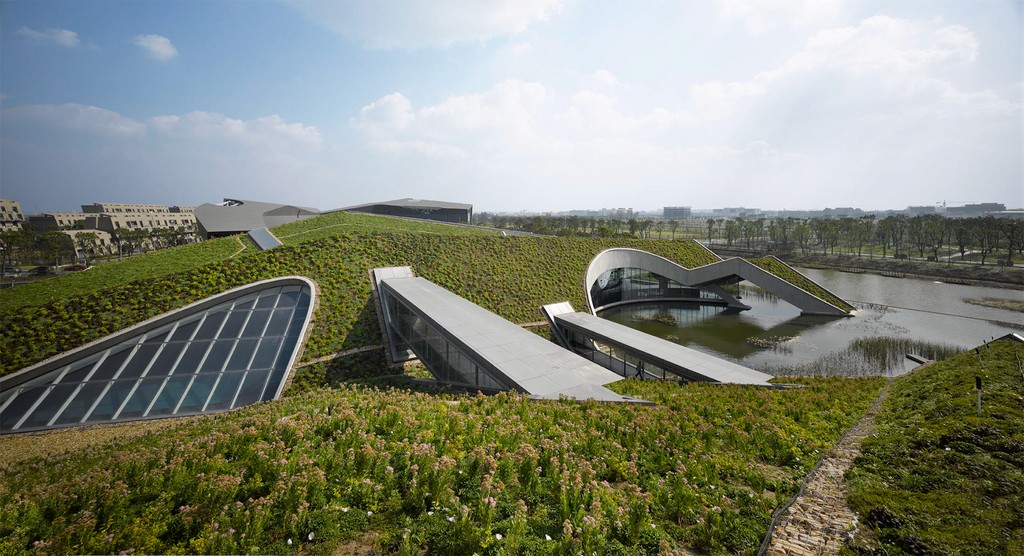
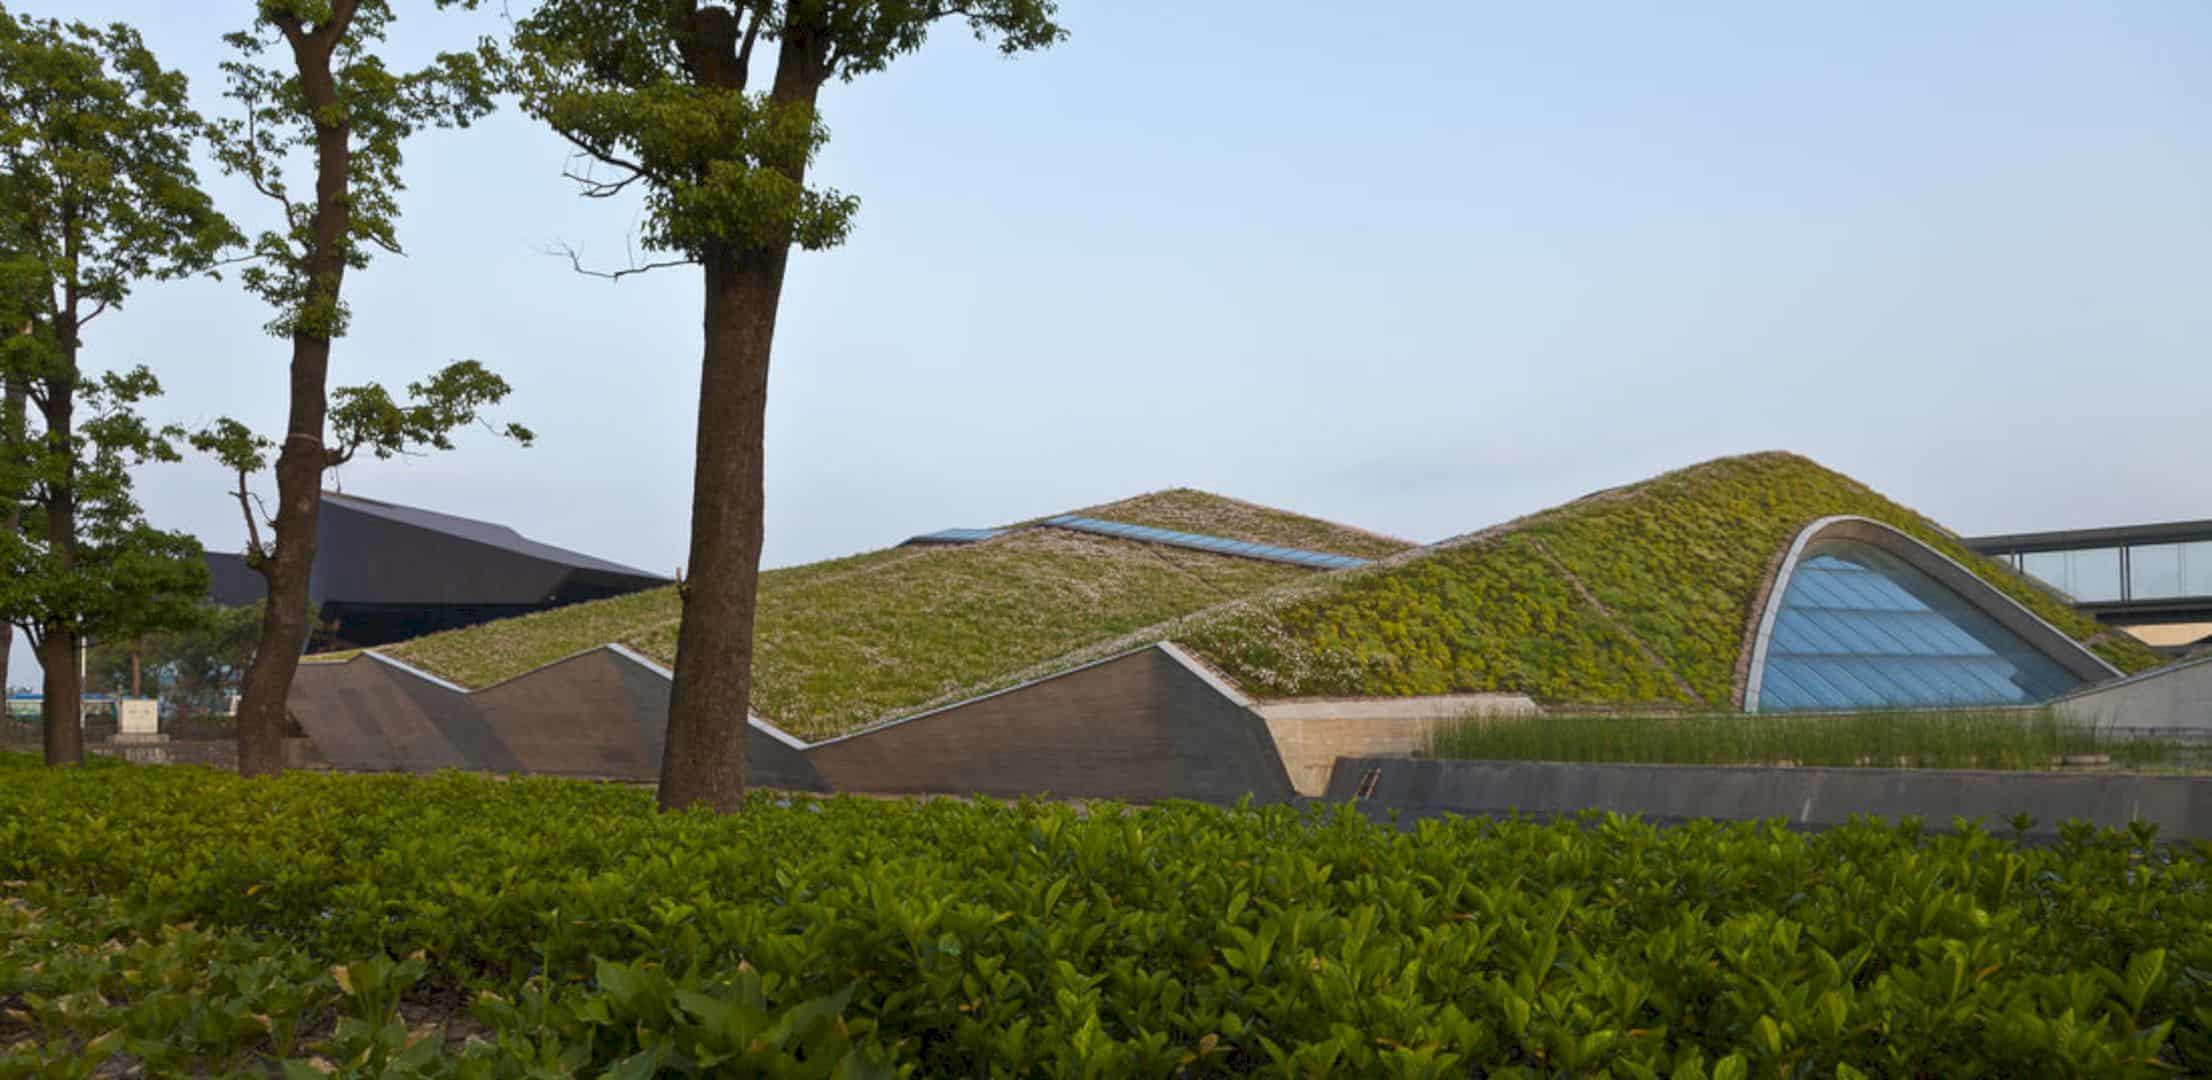
Giant Interactive Group Headquarters
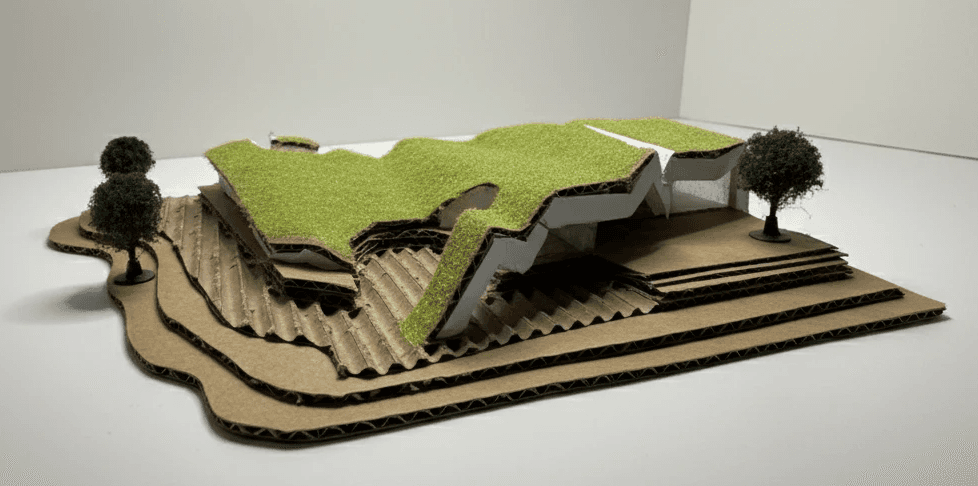
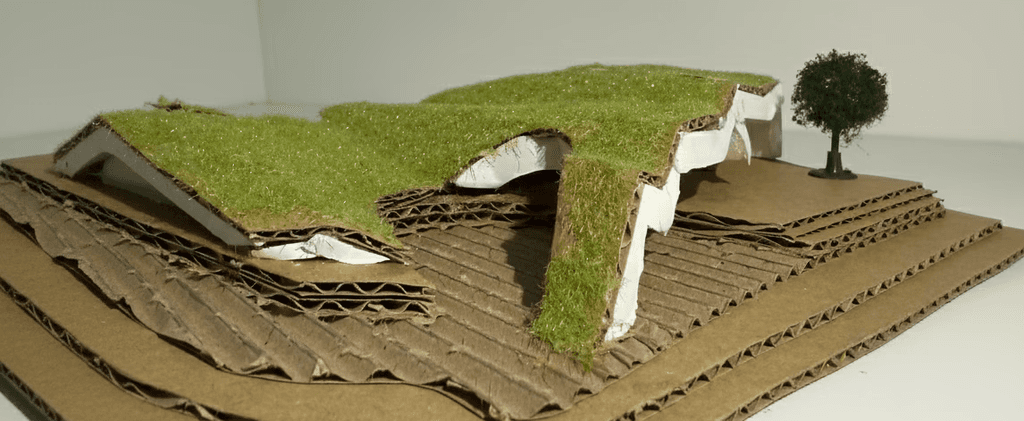
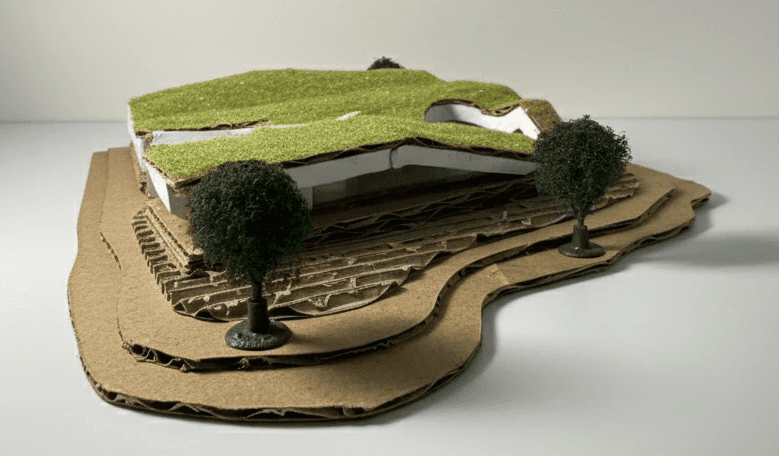
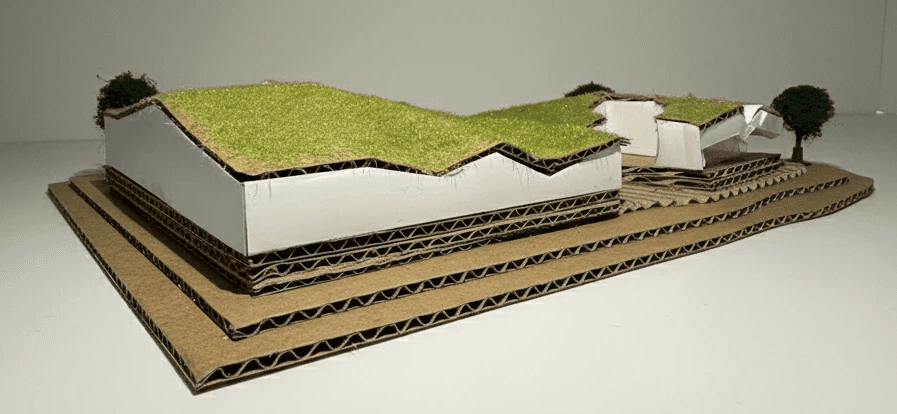
After learning how to make forms out of different materials, we had to pick a real-world structure to copy. I chose the Giant Interactive Group Headquarters designed by Morphosis Architects because I was very interested in how well it combined architecture and landscape. But I decided to focus on the landscape part of the design because the whole building was very big and complicated. This allowed me to look at and understand the process of modelling the environment's topography, levels, and spatial flow in more depth.
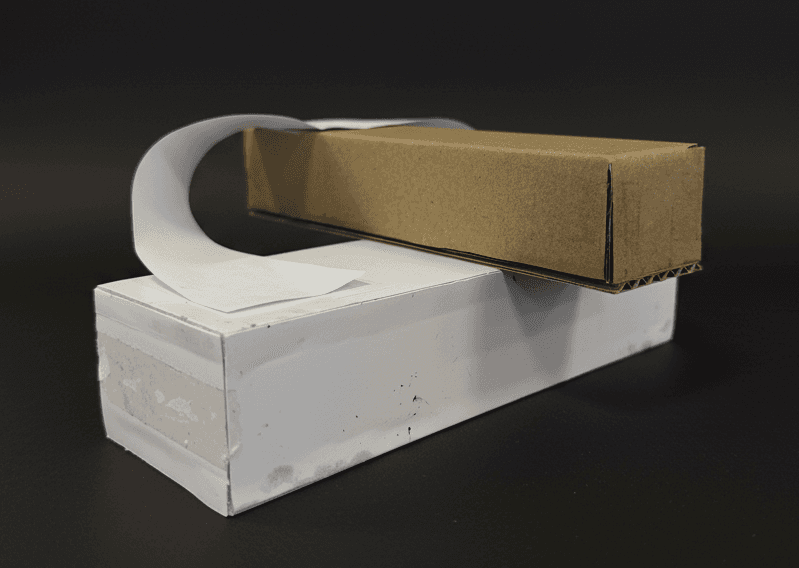
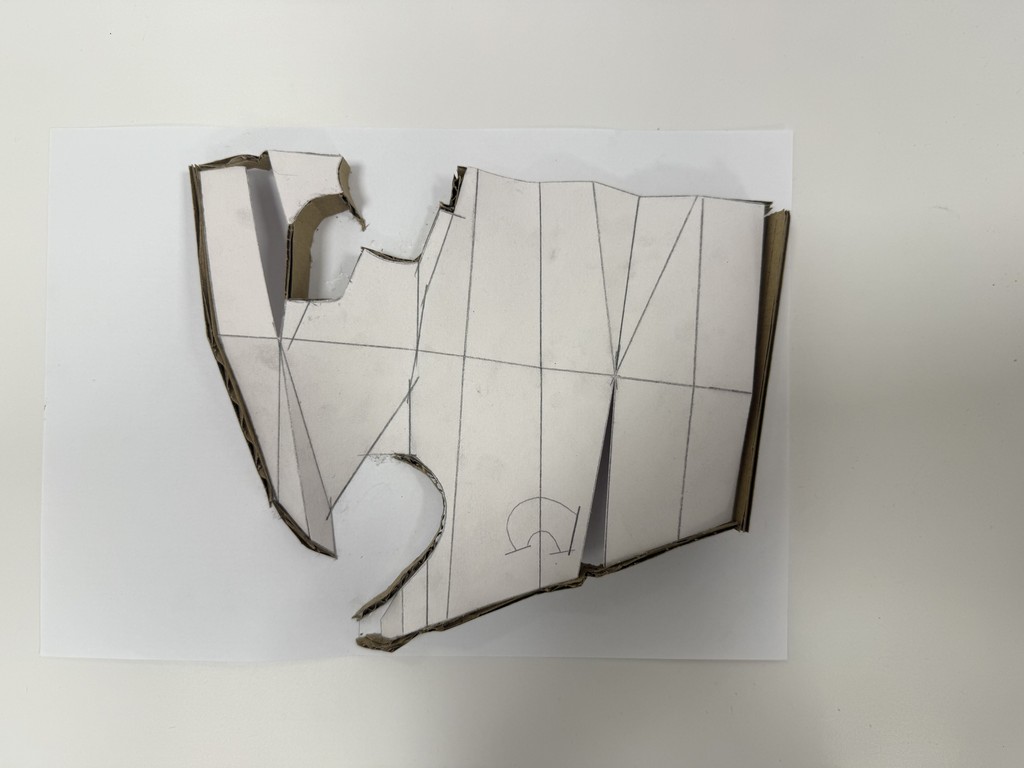
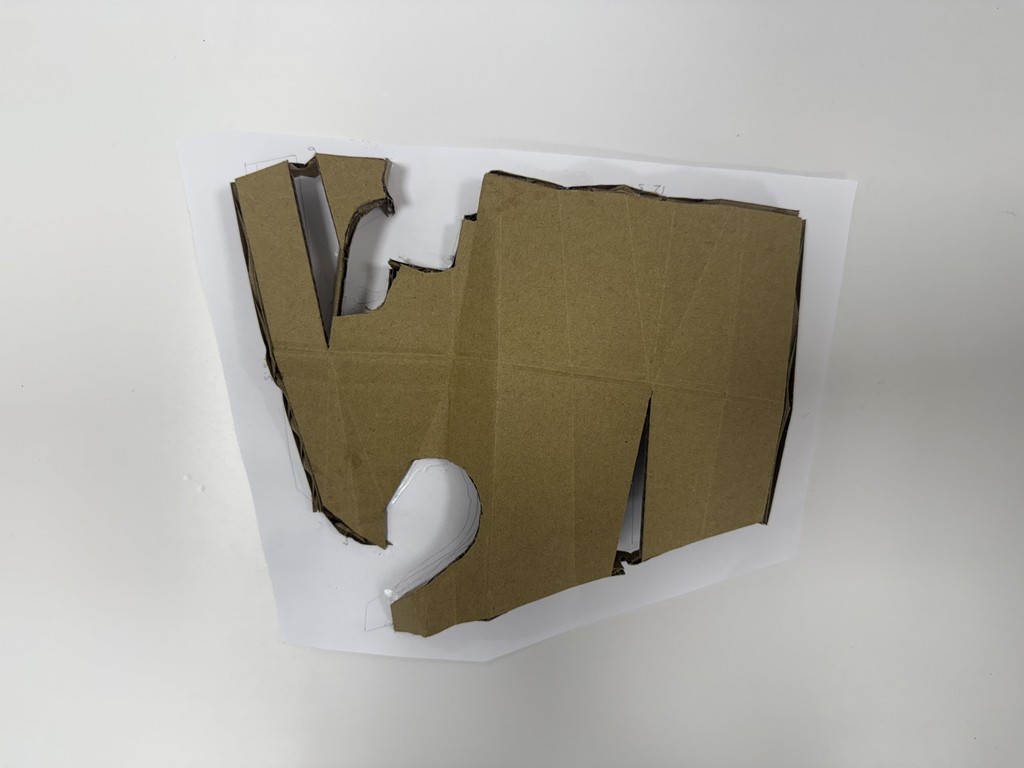
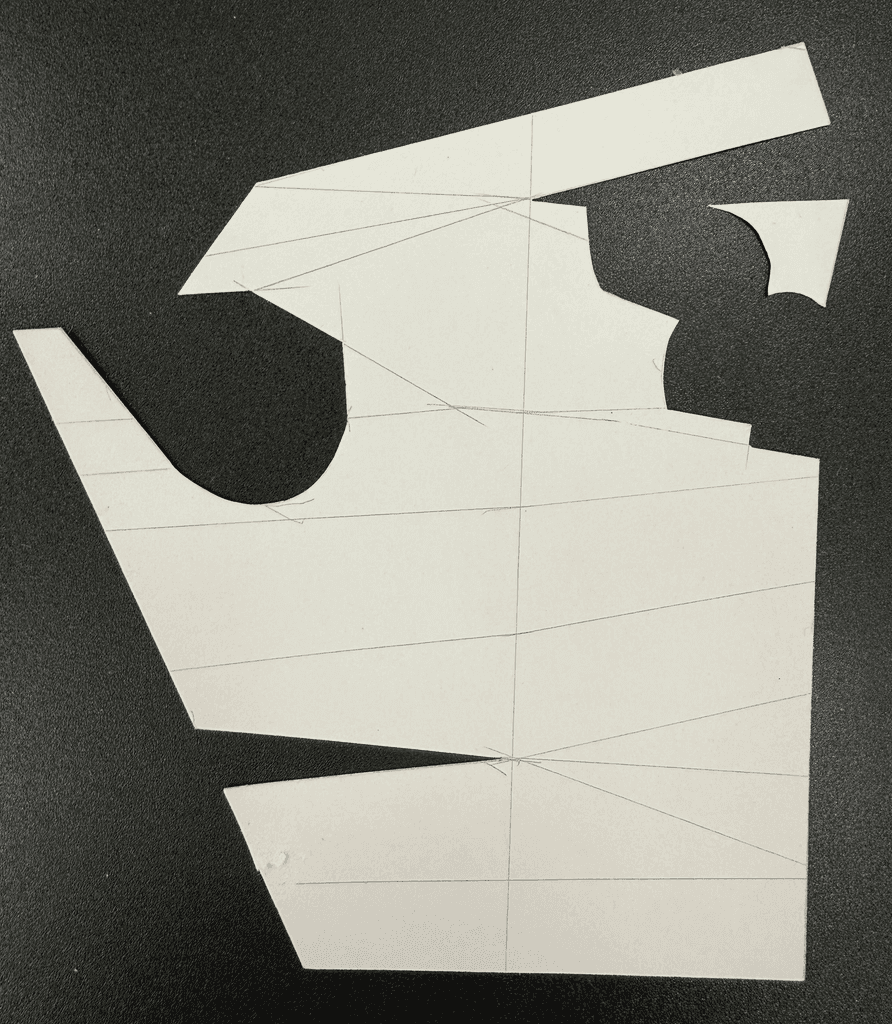
I had to guess the model's measurements to make sure it was to scale because I couldn't find any exact measurements online. In order to make sure these measurements were correct, I made several prototypes to see how each part would fit together. I was able to test the finished product's viability with the first prototype because paper and cardboard are easy to work with. I cut out separate pieces of paper to trace the parts for the next version. This process helped me figure out which dimensions needed to be changed before moving on to the second prototype. This helped me make sure that the finished model would be more accurate and precise.

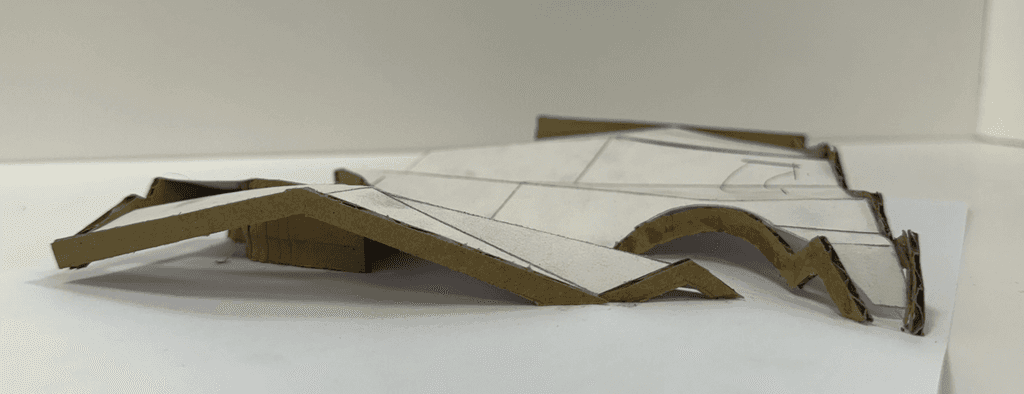


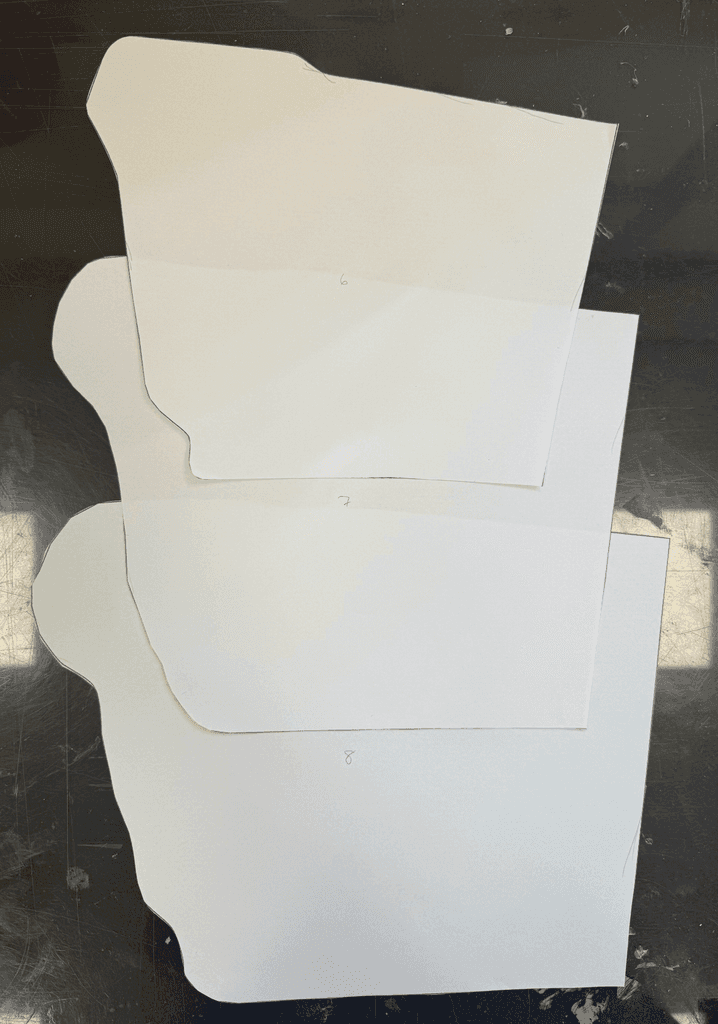
The second prototype helped me understand the model's overall size and how all the parts fit together better. I made the changes from the first prototype to make sure that all of the measurements were correct. This prototype was made entirely of cardboard because my final model would use cardboard and foam board to make a smooth finish. I could weigh cardboard and figure out how to support it because it is heavier and less flexible than paper. To make it stable, I used a foam block that was shaped to fit the inside of the structure. Most of the pieces in this prototype fit together well, but some small changes were still needed to make the final product better.
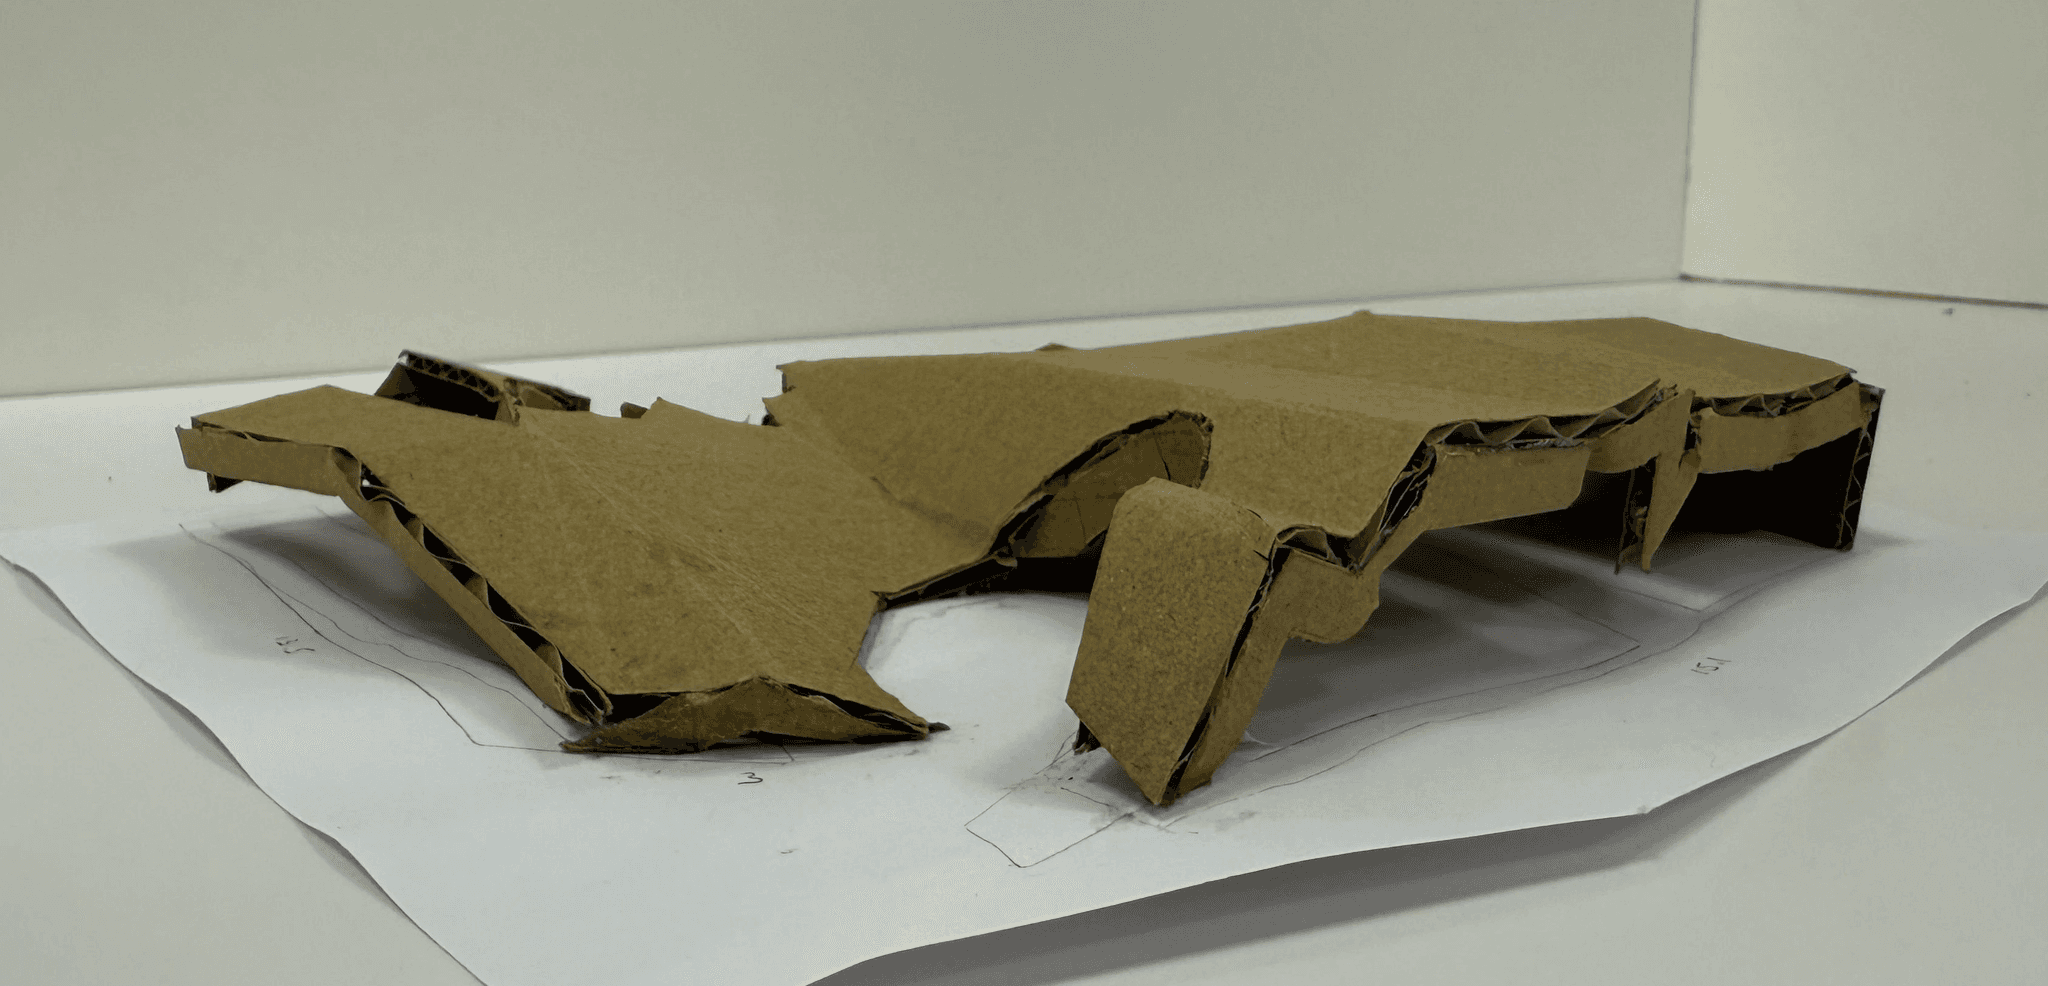
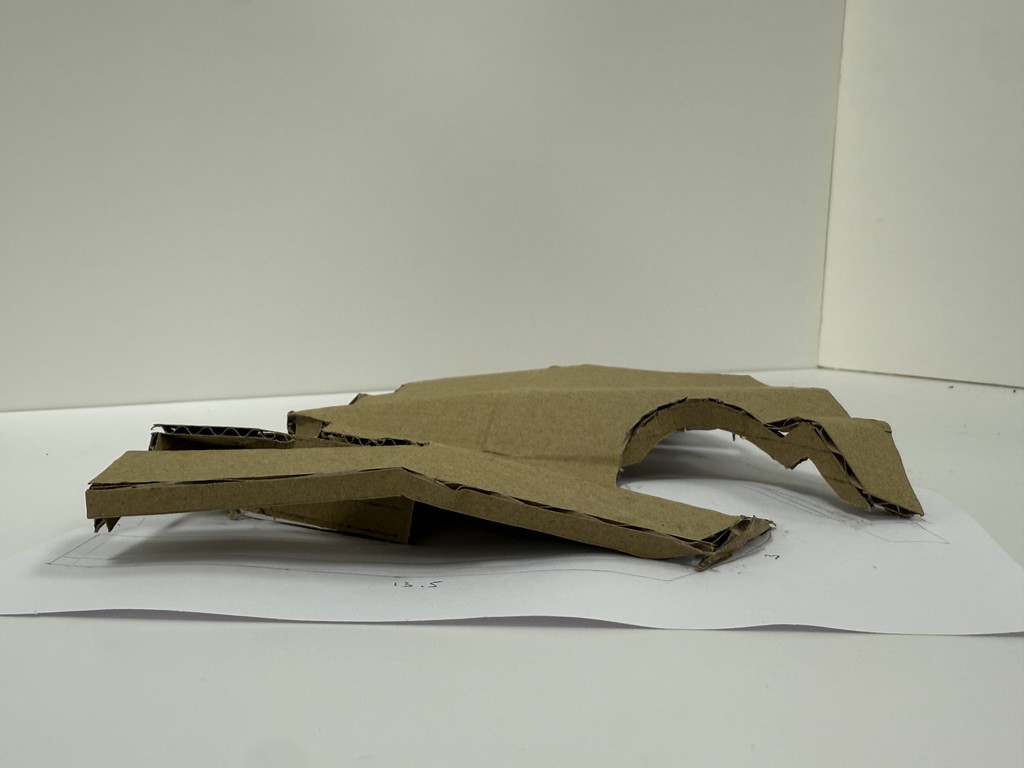
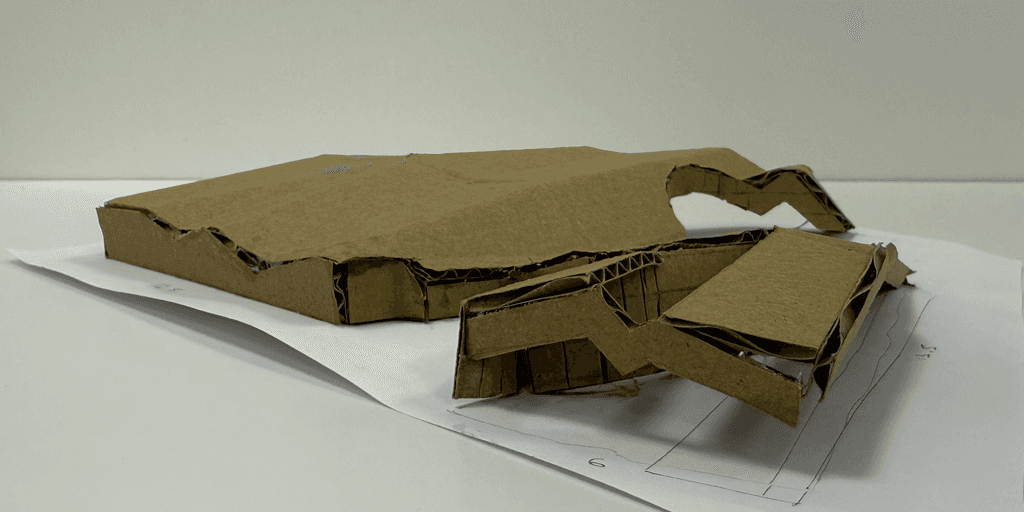
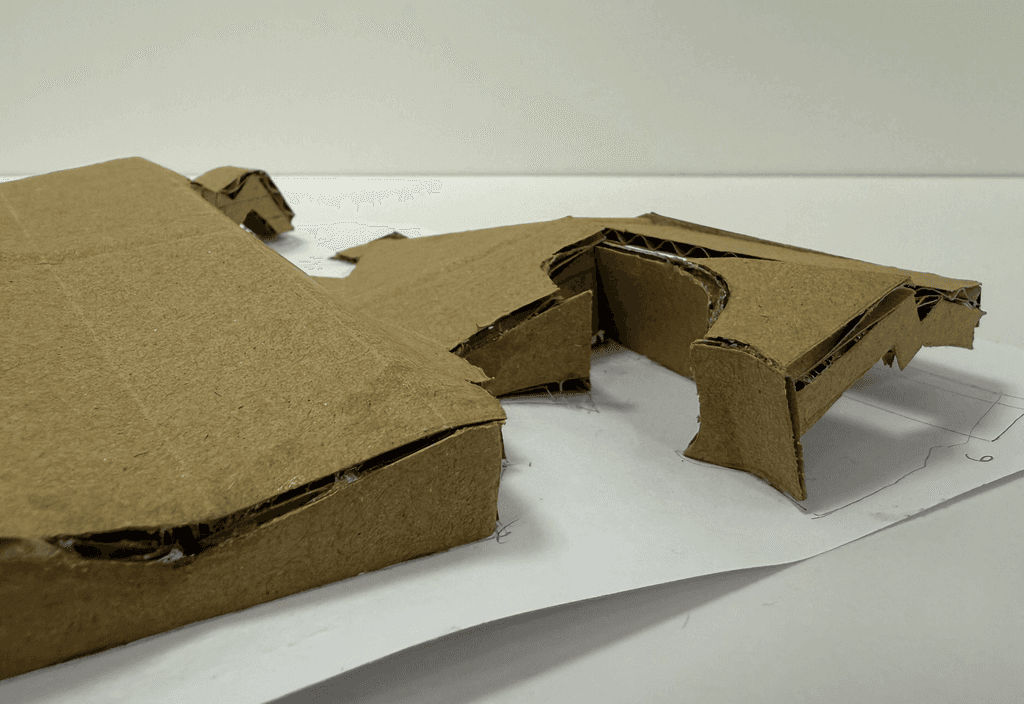
The second prototype helped me understand the model's overall size and how all the parts fit together better. I made the changes from the first prototype to make sure that all of the measurements were correct. This prototype was made entirely of cardboard because my final model would use cardboard and foam board to make a smooth finish. I could weigh cardboard and figure out how to support it because it is heavier and less flexible than paper. To make it stable, I used a foam block that was shaped to fit the inside of the structure. Most of the pieces in this prototype fit together well, but some small changes were still needed to make the final product better.


Final Model
Since cardboard and foam board gave my final model clean lines and a polished look, I chose to use them as the main materials. However, during the assembly process, I struggled to bend the foam board to form the proper curves because it broke easily when handled. I used cardboard as the foundation to reinforce the construction because paper was too thin to provide sufficient support. I also constructed the model's water components out of cardboard to better resemble the actual building's shape and textures.